Get 35% off Reg Priced Backdrops! Code :: GARAGESALE

0

Your Cart is Empty

Photographing Bodyscapes with Lori Poole

Photographing Bodyscapes with Lori Poole

Bodyscapes can be a unique addition to your studio offerings, especially if you shoot boudoir, glamour, fitness, or fashion! In this article, I’ll tell you everything you need to know to try your hand at this fun and creative photography style.

The Technical Stuff
The basics of bodyscapes are rather simple:
1. Start with the darkest and least reflective background you can find.
2. Block all ambient light coming into your shooting space.
3. Use lighting with spill-controlling modifiers if possible, such as barn doors, grids, or snoots. All of the images in this article were created with gridded stripbanks.
4. Place your light source behind and to the side of your model, so that the light skims across the body part you want to feature. (See lighting diagrams for reference.)
5. I prefer to shoot at an aperture of f/8 or higher to preserve skin detail. A shallow depth of field does not serve these images well, in my opinion. Of course, experiment with your own style.
6. Expose for your highlights. Light skimming across skin will blow out easily. Your blacks will block up, but that’s kind of the point.
7. Start playing!


Most standing bodyscapes can be accomplished with a single light source.

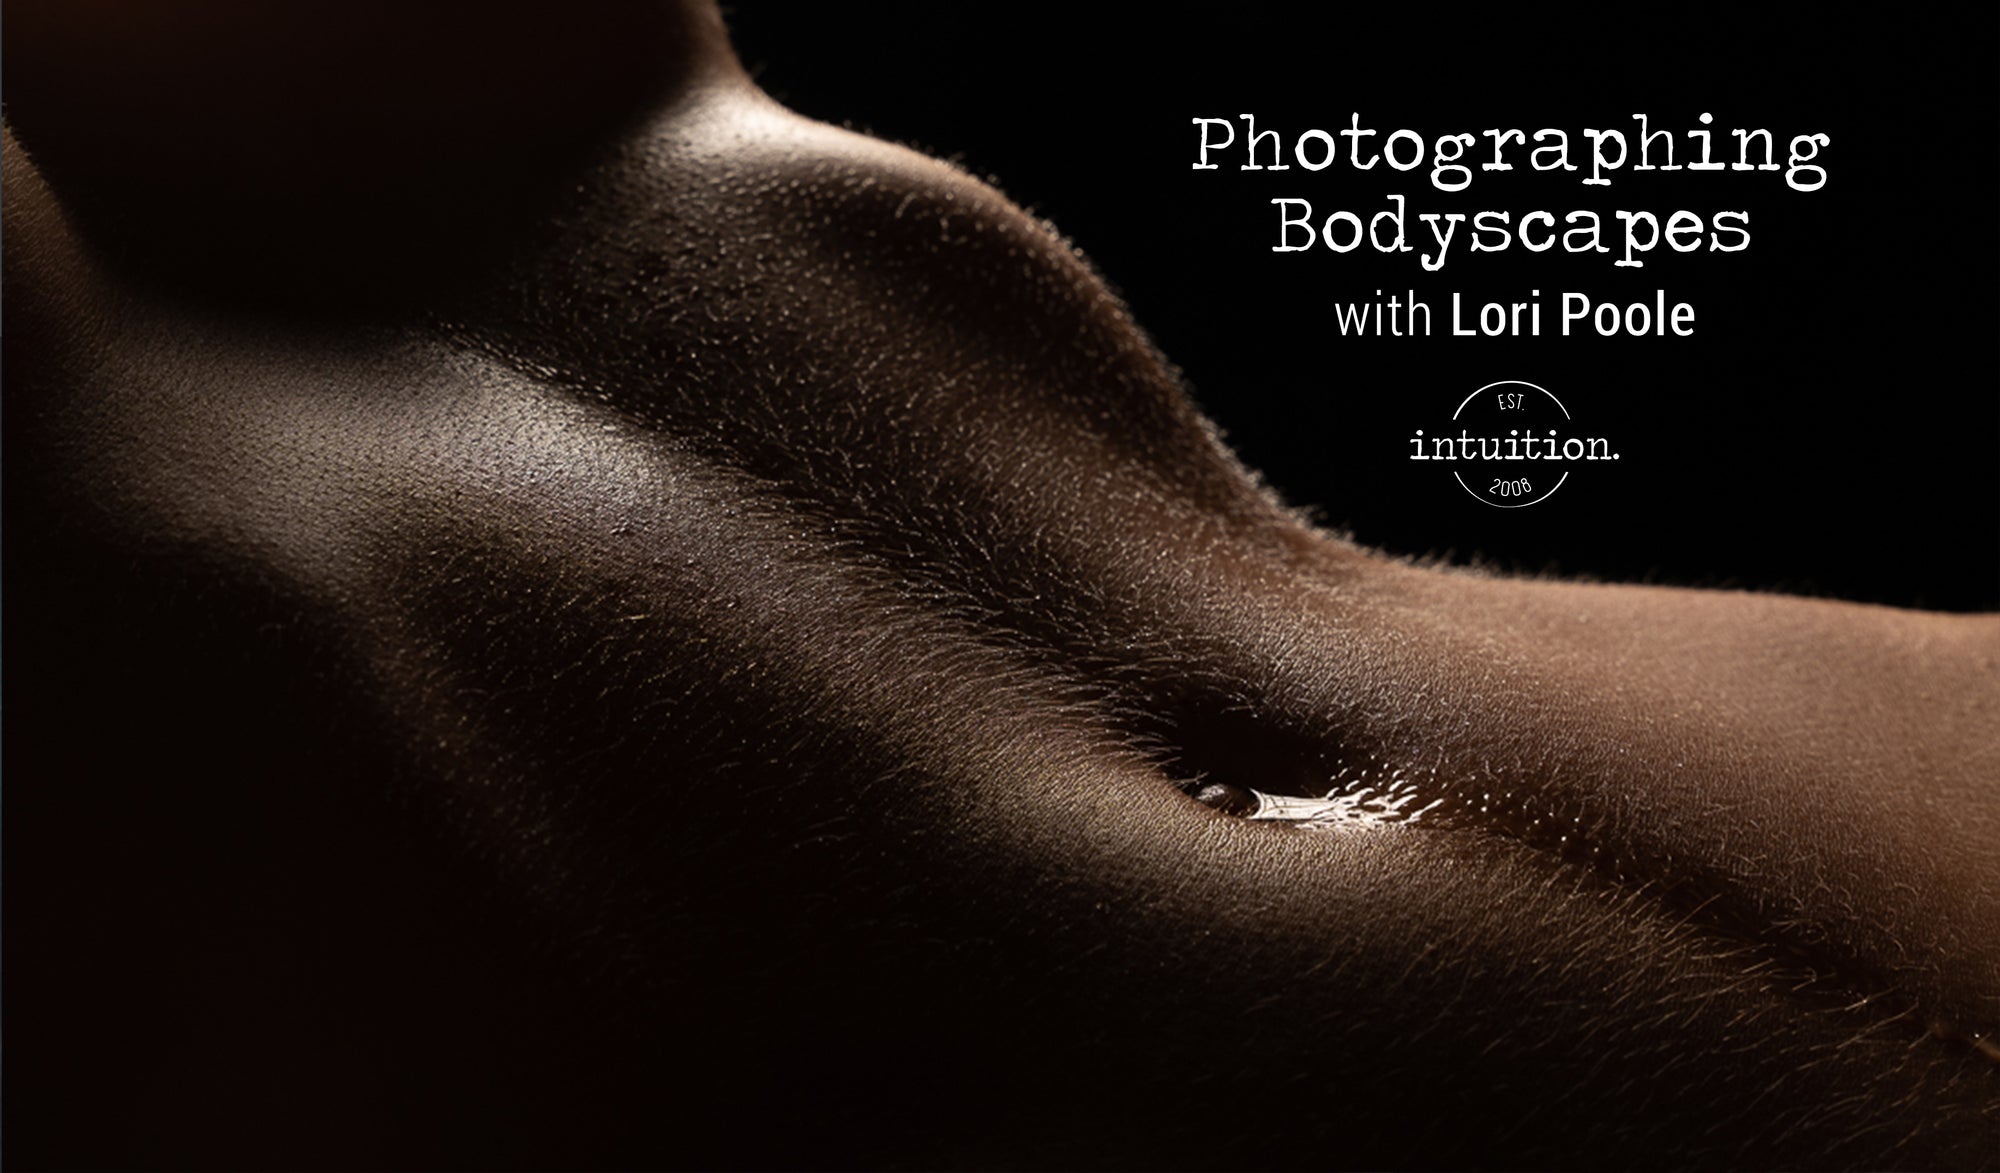
Reclining images may use one strip bank, turned horizontally, or an optional second strip bank off to one side.


Editing Bodyscapes
Some of your bodyscapes are going to look amazing straight out of camera! However, some will need a little bit of editing to get the clean lines you’re looking for. This took me a while to figure out! I tried to get every image right in camera, but I’ve learned where a little bit of editing will help me out. Here’s a few things I’ve learned to look past when I’m shooting:
Skin tones. Because of the angle of incidence and angle of reflection – or in other words, because the light is skimming across your subject’s skin – not only will your highlights blow more easily, but the skin color is often washed out. Your highlights definitely need to be corrected while shooting – there’s no pulling back a white textureless highlight. But the skin color is often added back during post. In Lightroom, this is often a quick slider adjustment of Temperature and/or Saturation.

Distractions.
Distraction clean up can also be expected to be done in post. It’s not uncommon to actually see your light source in the original image. Softboxes and light stands are especially prone to show in images where your subject is laying down, because keeping the light source low helps prevent lighting up too much of the body. Further, you may notice light spill on your background, table, body parts you didn’t want to show, etc. Because your background is already black, simply paint over these distractions with an adjustment brush in Lightroom with the Exposure slider pulled way down.

Skin highlight cleanup.
Some images will not have “perfect” lines as your rim light transitions to shadows. You may notice wavy-looking highlights as the light wraps around which could use some quick cleanup. Again, an adjustment brush painted over these transition areas can help clean up the rim lighting. Whether cleaning up background distractions or highlight-to-shadow transitions, these edits are super quick and rarely involve taking the image into Photoshop.


SOOC vs Edit. Lightroom edit includes 1) removal of softbox, 2) removal of light spill on platform and cloth, 3) removal of light spill on subject’s right arm, right leg, and face, and 4) highlight cleanup along elbow, underarm, and top of left leg. 

Standing Poses
Now that you know how to set up a bodyscape, and what your images might look like straight out of camera, it’s time to start shooting! I start with a few standing poses, most of which involve a single stripbank to highlight a specific body part. Here are a few of my favorite poses:

Reclining Poses
After the standing poses, I will switch to reclining photos. It’s easiest to pose your subject on a platform so that you do not have to lay on your belly to get eye-level with them. It’s easiest to cover your platform with a second backdrop or non-reflective fabric, so that you have the most flexibility with where to place your lights. If need be, you can also drape your original backdrop over your platform, but you will be more limited on your light placement. Here are a few of my favorite reclining poses:

Creative Effects
Got the standard bodyscapes down? Try adding some creative elements! A spray bottle with water will turn a regular bodyscape into a steamy detail shot. Or try adding colored gels for a unique effect.

Have fun! While getting started in bodyscapes is relatively straightforward, finding your posing, lighting, and editing style takes practice and imagination. Experiment, have fun, and let me know how it goes!

About the Author

Lori Poole is a full-time boudoir photographer in Wilmington, NC. She and her husband own Indigosilver Studio – Jeff specializes in weddings and headshots. Together, Jeff and Lori love sharing their knowledge of photography and business through their educational resource, Photo Insight. Lori runs a boudoir-specific education group on Facebook called Boudoir Insight, which is open to all boudoir photographers.


1 Response

Keith Godfrey
Keith Godfrey

June 08, 2023

Looking forward to trying this!

Leave a comment

Comments will be approved before showing up.


Also in Blog

MAXIMIZING YOUR STUDIO SPACE TO OFFER YOUR CLIENTS CREATIVE VARIETY WITH MIGUEL MORNA FREITAS

After years of on-location shoots and renting out scarce dance studio space for my dance photography, I finally realized my dream of opening my own studio space in 2022.
Read More
Mini Sweep Photography Backdrops

As a photographer, one of the most important elements of a successful shoot is the backdrop. A backdrop can transform a dull and uninteresting space into a stunning and professional-looking environment. Whether you're shooting portraits, product photography or still life, a backdrop is a must-have tool in your kit. In this blog post, we'll explore why backdrops are important and how to use them to take your photography to the next level and why I love the mini sweeps so much.
Read More
The Ultimate Guide to Multipurpose Holiday Backdrops for Stunning Year-Round Portraits with Zsa'nee Gaines

I get tired and bored with photographing the same thing day after day and client after client. However, buying a new backdrop for every occasion or because I’m bored doesn’t help the financial books.
Read More